How I Make my Flipped Classroom Videos
[Really wishing there was a way to change the thumbnail photo on YouTube shorts, but alas, that feature is not available yet! haha]
I switched to a Flipped Classroom model when I began teaching AP Calculus in 2015 and realized that I would struggle to finish all the curriculum and leave room for practice in class with a traditional model. I did NOT want to spend class time lecturing and giving notes and then send students home with difficult problems to do on their own, which would leave to frustration and most likely copying.
For the Flipped Classroom, students watch the videos that I make, take all notes (including examples and visuals), and then use their notes and each other to complete a variety of practice and exploration tasks the next day. I love it and would not want to teach without this model! I do NOT enjoy doing notes during class at all; they are such a waste of time and train students to be passive and compliant. I want students active, engaged, and leading the discussions. My personal belief is, “Student as worker, teacher as coach.”
I think the Flipped Classroom model works best when teachers make their own videos. During my first two years of teaching AP Calculus, I spent a LOT of time at home creating my videos from scratch, but I think it made all the difference for the students to see my putting so much work into the class. This motivated them to buy in and put in hard work as well. I think if I had just assigned pre-made videos on YouTube or some other educational site, I would not have had the same success. Even now, when I already have hundreds of videos in my EdPuzzle personal library, I still remake at least 3-4 videos per year and often personalize them to the senior class that year, either by including class photos or using songs popular during that school year in the intro. I still post links to videos made by other teachers (Khan Academy, AP Classroom, Deltamath embedded videos), if students need extra help and want to hear the concept explained a different way by another teacher, but they always start with the basic introduction video from me.
To make my videos, I have always used Microsoft OneNote. It has separate “Notebooks” at the top margin and “Pages” down the right-side column, which helps me organize my AP Calculus and Algebra II videos. I love having these saved - every few years, I remake a video and have the option to use the same outline, but erase the highlighting and examples for when I re-record.

I really like that OneNote has the option of changing the background on your notebook ‘paper.’ It can be a blank page, like in the photo above, or it can be a lined like a piece of paper or have grids like graph paper. You can also change the color of the lines/graph grids or the background color of the page:

Making a video from start to finish can take several hours, but once it’s done, it can be reused for as long as you want. The very first thing I do is write out everything that I want to include in the video ON PAPER. I’m a big paper person and need to see the whole picture first before rewriting it onto OneNote. This ends up helping me because when I assign a video that I created a couple years ago for homework, I don’t necessarily need to rewatch the video before the next day of class. Sometimes I do, especially if it’s a challenging topic. But I can also just read through my hand-written outline and know exactly what I showed students how to do in the video.
Once I am happy with my outline and examples on paper, I go to OneNote and type or write out a general outline. When recording, I typically already have the notes typed out and the example problems listed on OneNote, but I like to do out the examples “live” with the students. In my earliest videos, the examples were already fully written out and I would just talk through them, but I realized that the students were just rushing to copy them down and didn’t gain much because it was hard to see where all the steps came from. Now I do each step out and talk through my thinking. Visuals might already be there or sometimes I draw them out as I record.
In order to write precisely, I use my Wacom tablet that I’ve had since 2015. As you can see, it’s scratched up but still works great! It took a bit to get used to writing on the black tablet and seeing the writing appear on the screen. Since my model is a bit older, it still plugs into my laptop. The newer editions can connect wirelessly - I believe with Bluetooth.

I have also made videos with a stylus: I’ve used the Bamboo Ink Bluetooth stylus and also the HP stylus (photo below), but you need a touchscreen to use these. I bought myself a touchscreen laptop a year ago so that I could use a stylus again, but was heartbroken when it fell on the floor within just a few months. The screen cracked so I had to turn off the touchscreen feature to keep using it. Now I’m back to my Wacom tablet again!
To record myself, I used to use Screen-Cast-o-Matic, a free online software. The quality was decent but it left a watermark on the bottom left of the screen that students said sometimes covered up what I was doing. I heard about Screencastify during the Covid 2020 remote school year, and I love it. It’s all I use now. It’s built-in to my Chrome browser as an add-on. It’s free, good quality, and has good editing. I don’t do much more editing than cutting out mistakes or long pauses, so if you wanted to do more advanced editing, this might not be your top choice. It can also include the system audio, which I often use because I like to start off the videos with a brief song snippet during an intro.

This is my set-up below:
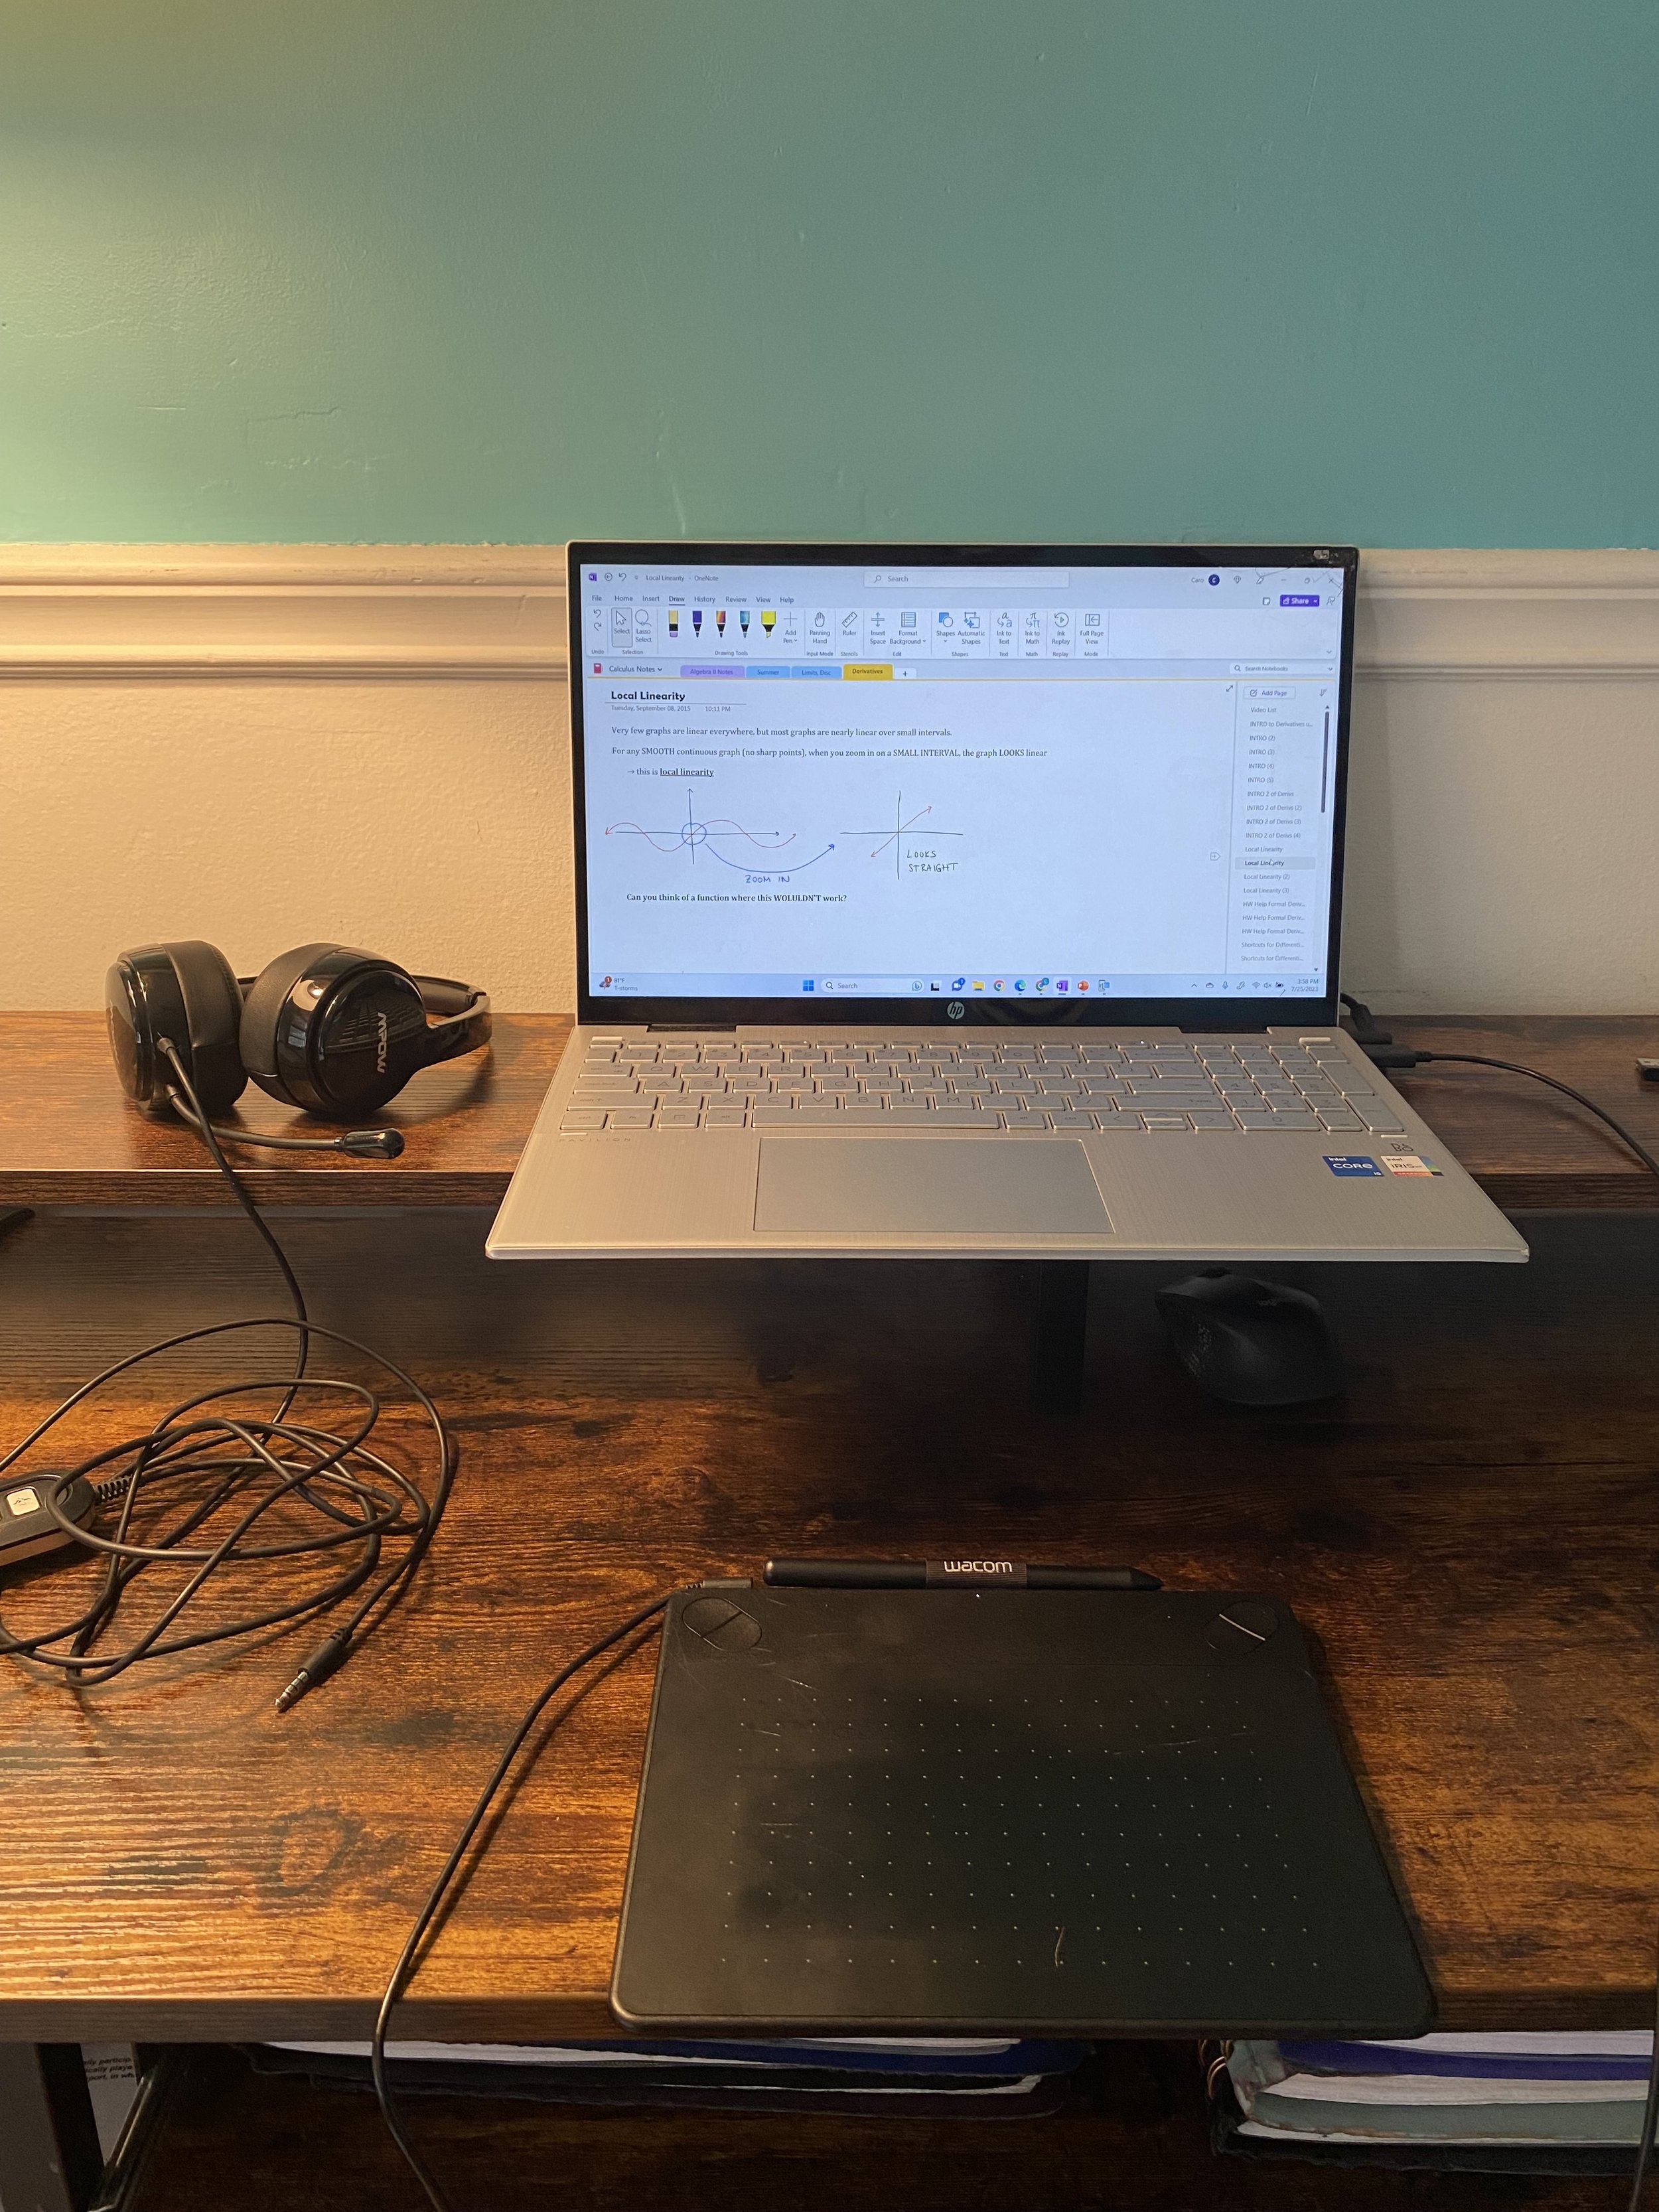
I started using headphones with a microphone in 2020, again during remote learning. I plug these right into my laptop. My students said the sound quality was much better when I wore them and they could understand me better. No longer did I have to stress about background noises while recording or remote teaching since students could typically only hear what I was saying into the microphone.
Once I’m all set up and the outline of my notes is pre-written on OneNote, I hit ‘record’ on Screencastify and begin talking into the microphone and writing directly onto my Wacom tablet, either writing out examples, highlighting steps, or creating visuals. Anything that I write on the Wacom tablet appears right on my Onenote page.
I used to hit “pause” every time I needed to stop for a moment to look at my paper outline. Sometimes I would even delete and hit restart if I made a mistake. Now I just record right through any mistakes and cut them out while editing.
Once a video is recorded and edited, I download it to my laptop and then upload it to EdPuzzle. Each year, I create a new EdPuzzle classroom and students use their school Google accounts to login and watch. I used to upload my videos to YouTube and have students comment on the video to make sure they actually got to the video. However, this didn’t really show that they WATCHED the whole video, and based on video quizzes, I found some students would comment quickly, close the website, and then just copy the notes down from a friend.
On EdPuzzle, in order to get credit, they need to watch the entire video. EdPuzzle shows exactly how much of a video a student has watched, when they watched it, and whether they replayed any portions of the video.

Sure, students can still hit play and walk away or mute the video, but it’s still more of a guarantee than when they were posted on YouTube. Students learn pretty quickly that if they don’t truly watch the videos and pay attention, they will struggle in class and not learn the material.
Another thing I am picky about: in order to earn full credit, students need to write down the ENTIRE video - all notes, examples, and visuals!
This is the entire process that has worked for me so far in my teaching.